 |
| Restoration |
 |
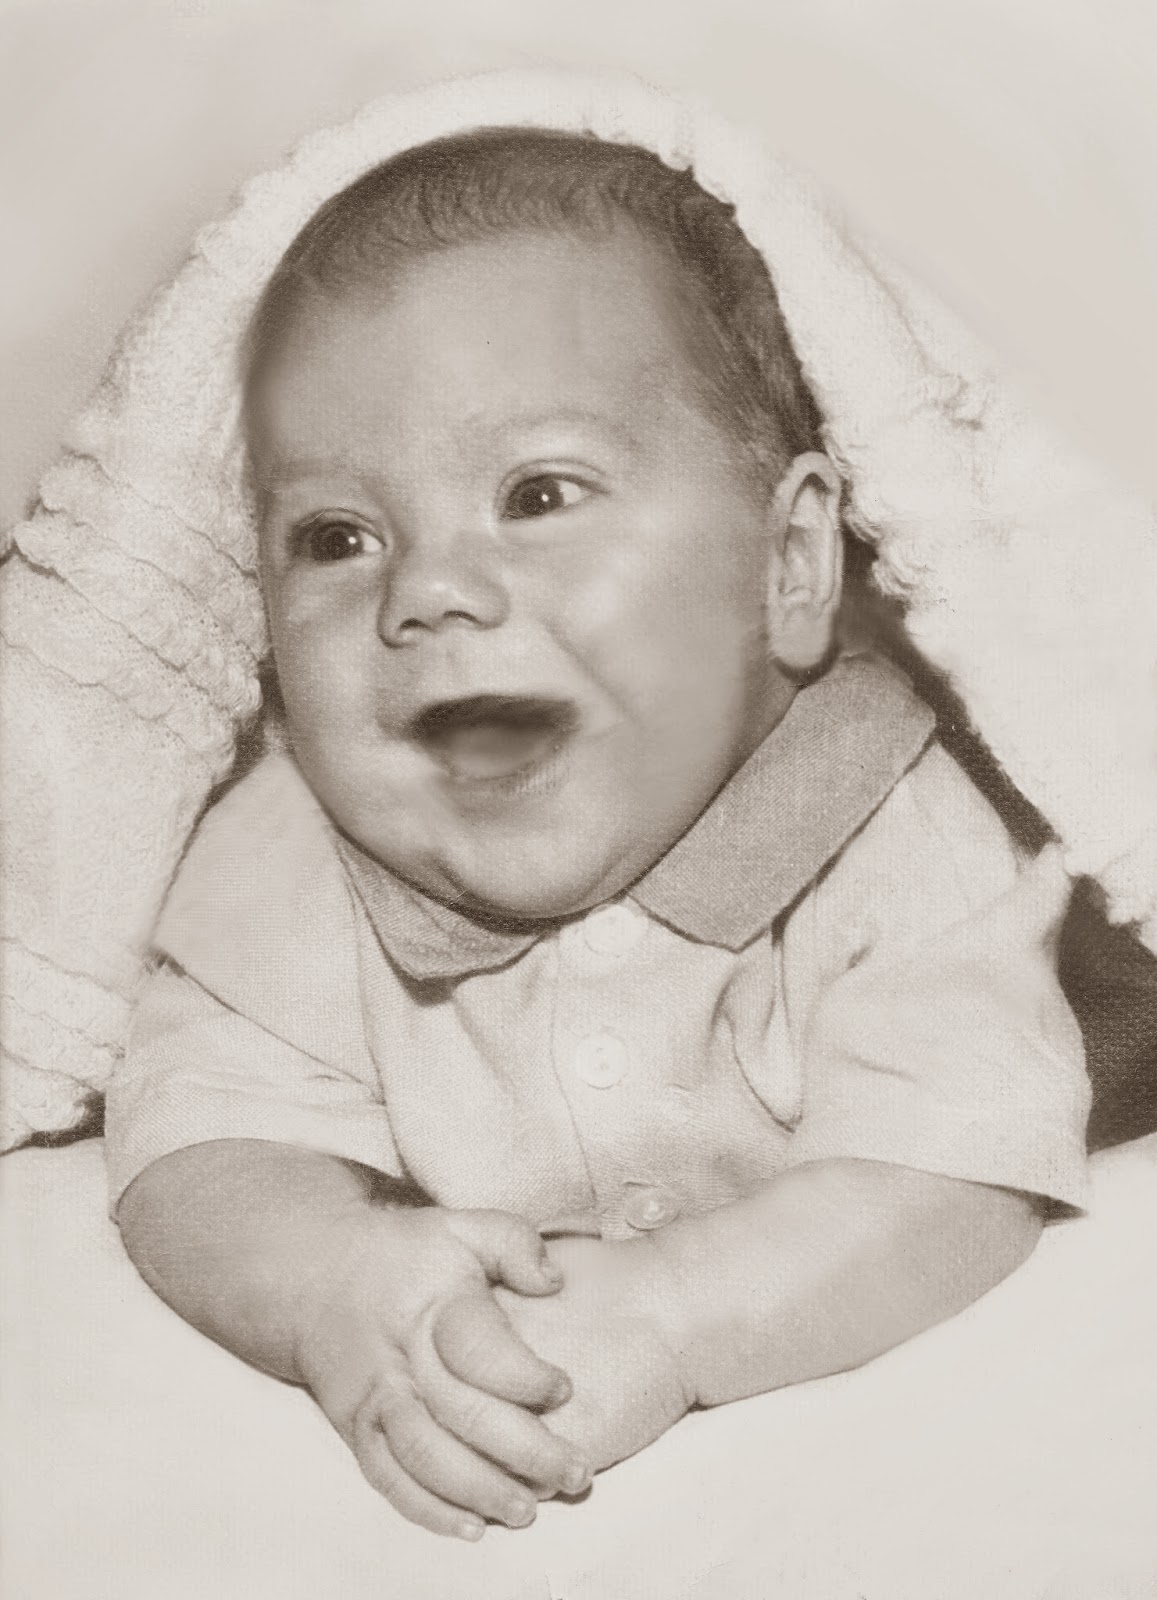
| Original |
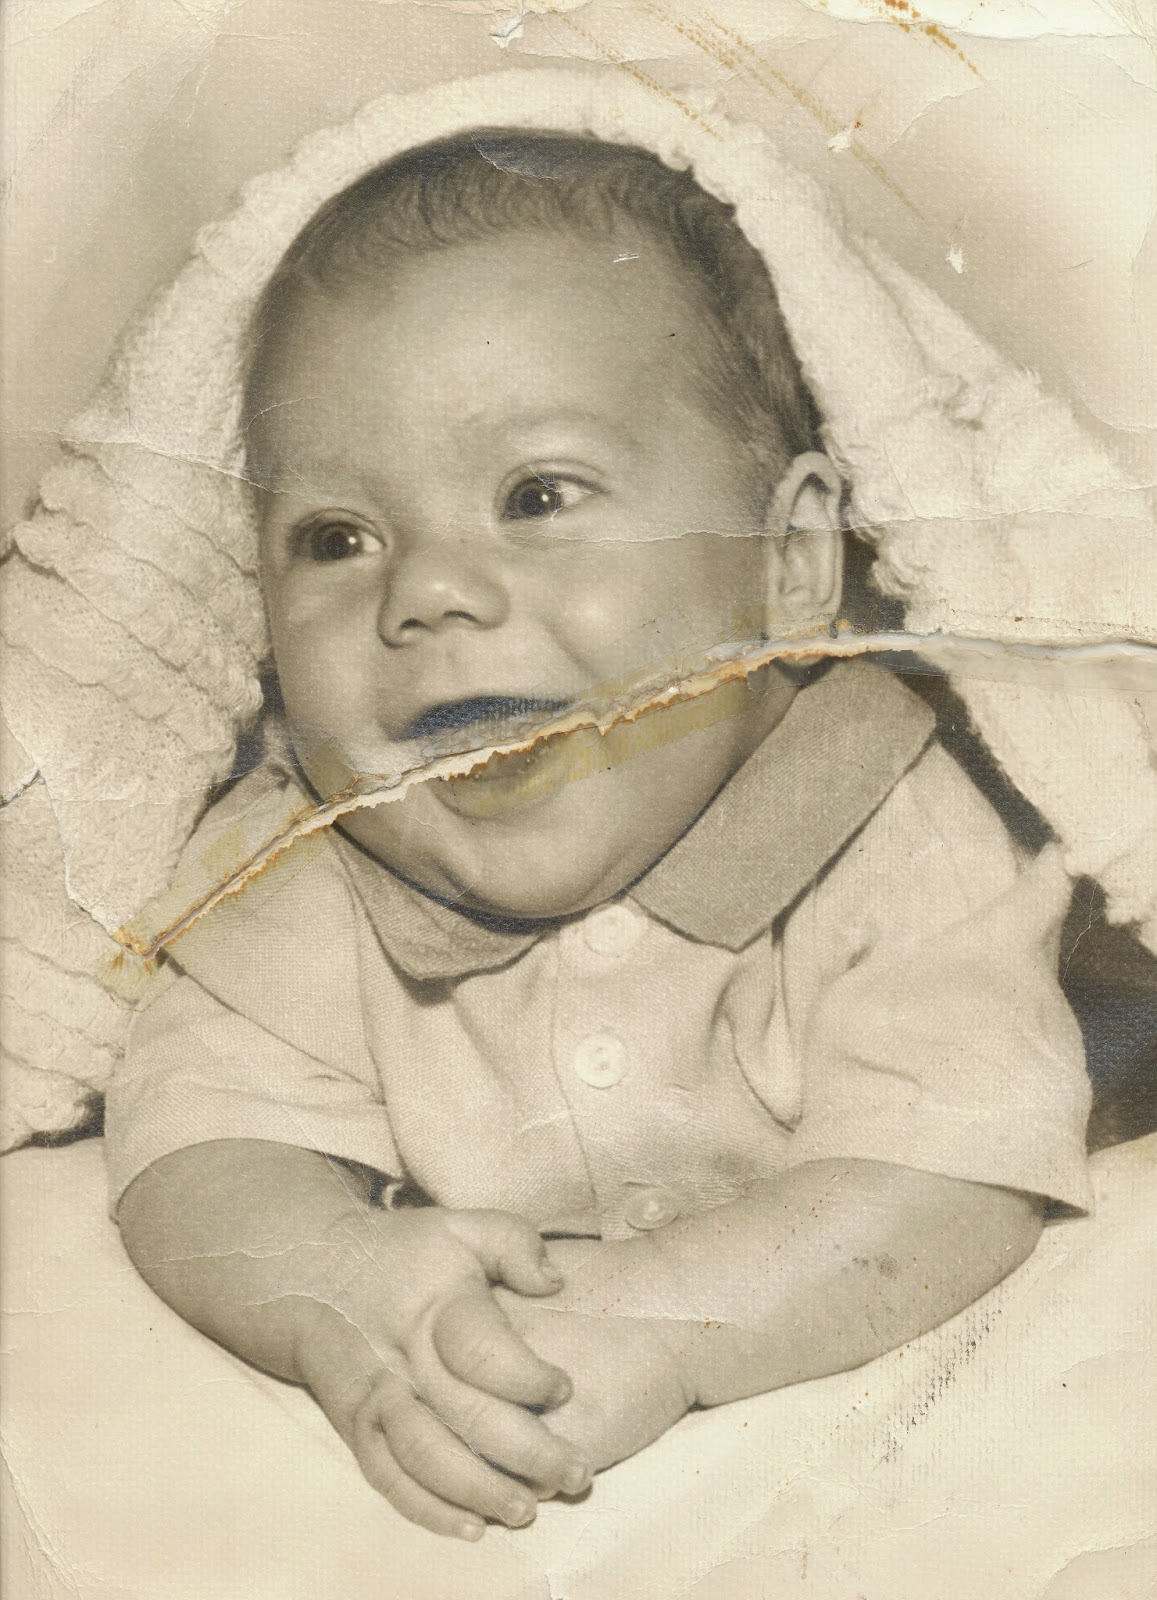
I chose this photo, option #3, because I thought the tears and bends in the photograph would be quite a challenge to restore.
I started restoring the image of the baby by changing the image to black and white. By removing the saturation in the sepia tones it took away the vintage appear to the photo and I could then start retouching and fixing the tears and abrasions in the picture.
I then created a new layer to begin restoring the image by sampling a near by area of the tear along the baby's mouth and clone stamping away the rip. I removed this tear first because it was the largest imperfection in the photo, so tackling the largest task first was a priority for me.
With another layer I repeated the process of sampling a near by area and clone stamping imperfections and tears or bends out of the image along the baby's arms, shirt, and face. I sampled near by areas to clone stamp the abrasions out because it replicates the skin or clothing tone and texture the best for that specific spot.
Finally, I clone stamped and painted with grey tones the background and foreground beneath the baby's arms almost entirely out to remove the remaining stains, tears, and bends and adjusted the lighting and contrast to brighten the image.
Overall, I am fairly happy with my results, especially in the difficult task to restore the baby's mouth, but I was disappointed to see that my final restoration does not show up in true black and white tones on this website.
Yes,, I don't know why the colour gets altered when you post the photo. This happened to several people. The mouth was the toughest part Teagan and you did a good job putting detail back in instead of even grey. The brightened background also helps the appearance significantly. I know that time lost due to illness restricted you to the minimum requirements this time.
ReplyDelete